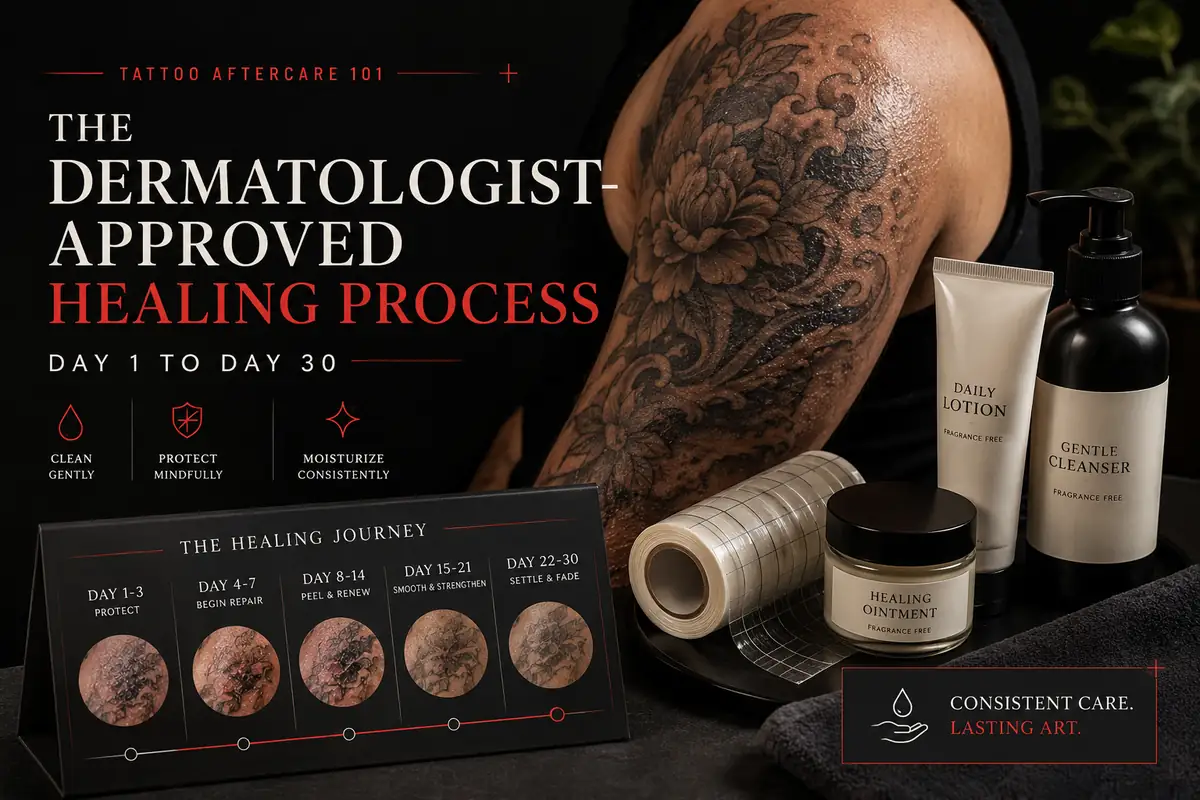
Congratulations. You made it through the buzzing needles, paid your artist, and walked out of the studio with a piece of art you chose on purpose. It is a great feeling. It is also the moment when your job quietly begins.
Right now, your tattoo is not just art—it is technically an open, weeping dermal wound.
The appearance and longevity of your tattoo depend roughly 50% on the skill of your artist in the studio, and 50% on how diligently you protect and care for that wound over the next 30 days. Proper aftercare locks in crisp linework, prevents pigment drop-out, and shields your skin from dangerous bacterial infections.
To give your tattoo the best chance to heal cleanly, follow this step-by-step, dermatologist-informed aftercare timeline.
Phase 1: The Initial Lockdown (Hours 1 to 24)
When you leave the chair, your artist will thoroughly clean the area and apply a protective barrier. This will either be traditional plastic cling wrap or a modern, medical-grade breathable adhesive bandage (commonly known as Saniderm or SecondSkin).
| Healing window | What may be normal | What to do | What to avoid |
|---|---|---|---|
| Hours 1-24 | Warmth, plasma, ink seepage under the wrap | Follow your artist's wrap instructions and keep hands clean | Leaving plastic wrap on overnight unless instructed |
| Days 1-3 | Tenderness, mild redness, light weeping | Wash gently, pat dry, apply a very thin ointment layer | Scrubbing, soaking, dirty towels, heavy ointment |
| Days 4-14 | Flaking, tightness, strong itching | Use light unscented lotion and let flakes fall naturally | Picking, scratching, tight clothing |
| Days 15-30 | Shiny "silver skin" and slight dullness | Moisturize daily and protect the area from sun | Unprotected UV exposure and friction-heavy routines |
If Using Traditional Plastic Wrap:
Leave this wrap on for exactly 2 to 4 hours as instructed by your artist. Do not leave it on overnight. Plastic wrap traps body heat and plasma, creating a literal petri dish for bacterial growth if left on for too long.
If Using Medical Adhesive (Saniderm):
This advanced bandage can typically stay on for 3 to 6 days, depending on how much fluid your body releases. It is normal if you notice a dark, murky bubble of fluid forming under the plastic sheet. This is a mix of excess ink, plasma, and blood. Think of it as your body's healing serum. However, if the fluid leaks outside the edges of the seal, remove the bandage immediately, as the sterile barrier has been compromised.
Phase 2: The Gentle Cleanse (Days 1 to 3)
The first wash is the critical turning point for your healing skin.
- Wash Your Hands First: Never touch a fresh tattoo with dirty hands. You will introduce surface bacteria directly into your open skin.
- Use Lukewarm Water and Soap: Avoid scorching water, which opens the skin pores and bleeds ink out. Use your bare fingertips (never a washcloth or loofah) to gently massage the area with an unscented, antibacterial liquid soap (such as Dial Gold or Cetaphil). Make sure you wash away the slimy layer of dried plasma.
- Air Dry or Pat Dry: Do not rub your tattoo with a household towel, which may hold bacteria and rough fibers. Pat it gently with a clean paper towel, or let it air dry for about 15 minutes.
- Ointment Application: Apply a very thin layer of healing ointment (like Aquaphor or a tattoo-specific brand). The rule here is simple: Less is more. Your skin needs oxygen to heal. If the tattoo looks shiny, wet, or greasy, you have applied too much. Wipe away the excess gently with a paper towel.
Phase 3: The Flaky, Itchy "Snake Skin" Stage (Days 4 to 14)
Around day four, your tattoo will stop weeping and begin to tighten up. This is where the true mental test begins. The skin will start to flake, crack, and peel exactly like a heavy sunburn.
The Golden Rule: Absolutely No Picking or Scratching
As the dead skin peels, it will be loosely attached to the fresh ink underneath. If you pull off a hanging flake too early, you risk pulling out ink from the dermis, leaving pale gaps and faded patches in your design. Let the skin shed naturally in the shower.
Conquering the Dreaded Itch
The itch during week two can feel maddening. This is usually a sign that your skin nerves are recovering. When the itch strikes, do not scratch. Instead, tap the tattoo gently with an open palm, or apply a small amount of non-comedogenic, unscented water-based lotion (such as Lubriderm or Aveeno) to soothe the irritation.
Phase 4: Structural Deep Healing (Days 15 to 30)
By day 15, the heavy peeling will have subsided, revealing a shiny, slightly wrinkled new layer of skin covering your design. This is called the "silver skin." While the surface looks structurally healed, the deeper layers of the dermis are still actively repairing themselves.
- Switch to Daily Lotion: Stop using heavy ointments and transition into applying a standard unscented daily moisturizer 2 to 3 times a day to restore your skin's natural moisture barrier.
- Keep Hydrated: Continue drinking plenty of water to accelerate cellular turnover from the inside out.
The Capital Sins of Tattoo Aftercare: What to Avoid
To lower your risk of infection or patchy healing, avoid these four elements during the first 30 days:
- Submerging in Water (No Swimming/Baths): Showers are fine, but avoid swimming pools, hot tubs, lakes, and bathtubs. Standing water can carry irritants and bacteria that are rough on healing skin.
- Direct, Unprotected Sunlight: Fresh ink has no meaningful UV defense. Direct sunlight can fade and irritate healing skin quickly. However, do not apply sunscreen to an open wound. Keep the tattoo covered with loose clothing until day 14, and only apply SPF 50+ once the skin has stopped peeling.
- Tight, Restrictive Clothing: Friction is the enemy of a healing tattoo. Avoid tight jeans, bra straps, or waistbands that rub continuously against the fresh design, as this can forcibly dislodge healing scabs.
- Intense, Heavy Workouts: Avoid heavy, sweat-inducing gym sessions for the first 5 days, especially if the workout stretches the specific area of your body art. Sweat traps bacteria against the skin, and heavy movement can tear open newly forming scabs.
A Masterpiece Deserves Perfect Planning
Proper aftercare helps your tattoo stay as crisp and readable as the design you fell in love with. If you are still planning your first piece, choose placement carefully before you ever reach this stage. Our tattoo pain map can help you avoid high-friction, high-pain areas that are harder to heal.
Before committing to a permanent size, use our AI Tattoo Generator and Body Simulator to explore sizing and layout on different areas of your body. Then bring the strongest version to your artist; if you are unsure how to start that conversation, the tattoo artist consultation guide gives you a simple script for references, pricing, and etiquette.
Preview the idea before you book ink
Use AI Tattoo Generator to turn your concept into a visual reference, then test placement on your own photo before talking with an artist.
Create Tattoo